Scott Aerator
Scott Aerator Solar Pond Aerator - DA-20, 2-Panel
Scott Aerator Solar Pond Aerator - DA-20, 2-Panel
Couldn't load pickup availability
-
Free Shipping
Fast, free delivery to the Lower 48 on fountains and aerators.
Free shipping (Lower 48).
-
Expert Sizing Help
Tell us your pond size and get a perfect-fit recommendation.
Tell us pond size → perfect fit.
-
No Sales Tax*
Save more on your order. *Excludes Arizona.
No sales tax* (*AZ excluded).
-
Manufacturer Warranty
Factory-direct coverage on your motor for peace of mind.
Factory warranty on motor.
-
Price Match Guarantee
Found it for less? We’ll match it.
Found it for less? We match.
-
Secure Checkout
Shop Pay · Visa · MasterCard · PayPal
Shop Pay · Visa · MC · PayPal
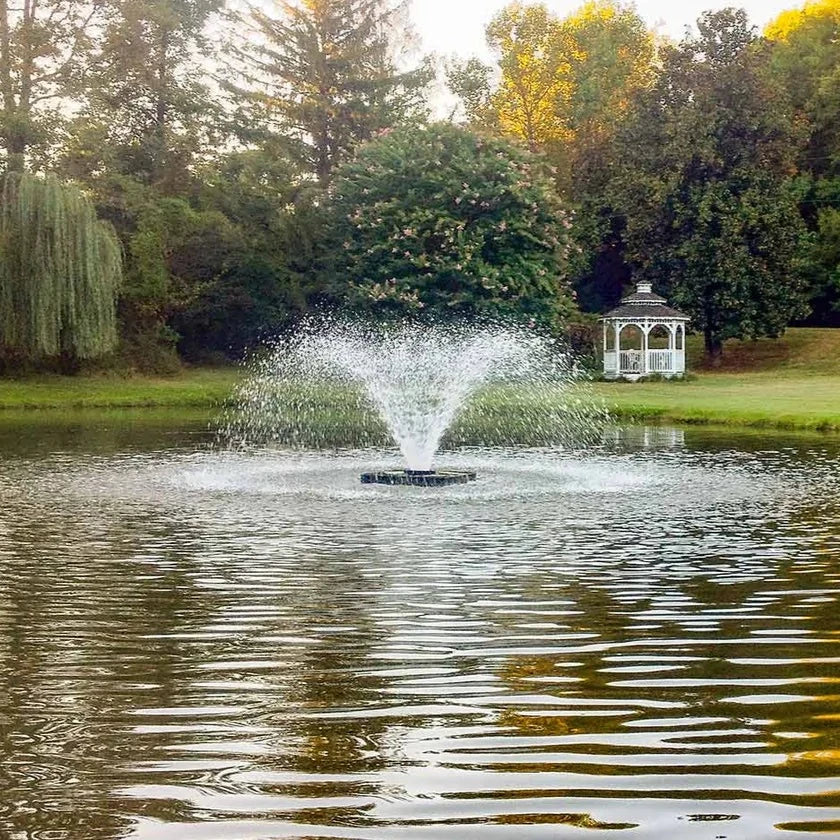
Enjoy beautiful water displays and eco-friendly pond aeration with the Solar Powered DA-20 Display Aerator. This 1/2 HP floating fountain delivers a stunning trumpet-shaped spray while naturally improving your pond’s health—no electric grid required. Perfect for remote or off-grid locations, this solar fountain system is low-maintenance, efficient, and designed to last.
Key Features
- Flow Rate: 200 gallons per minute for effective surface aeration
- Spray Pattern: 4 feet high, adjustable width from 7 to 15 feet
- Motor: 48V, 3-phase, 60Hz, 10.3 amps, 370 watts
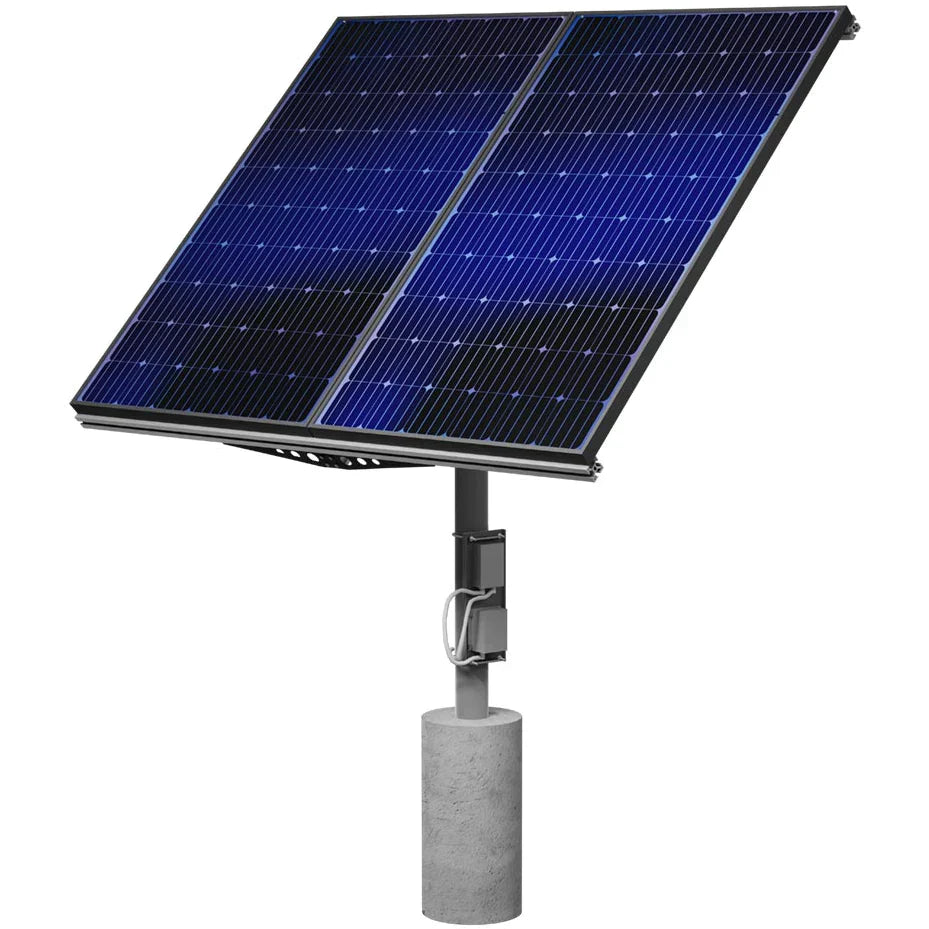
- Solar Panels: Two high-efficiency 325-watt mono-crystalline panels (39" x 65")
- Minimum Pond Depth: 32 inches
- Anchoring Required: Two 30-lb weights or concrete blocks (not included)
- Power Cord: 70 feet of 12-gauge submersible cable (longer available)
- Warranty: 5-year motor warranty, 1-2 years on additional components
- Maintenance-Free: Oil-free motor and winterization-free design
- Safety Certified: UL and NEC compliant package
How It Works
This solar aeration system uses sunlight to activate its submersible motor and fountain spray during daylight hours. No batteries needed—just clean energy converting to consistent aeration. It improves water clarity, oxygen levels, and pond health, helping eliminate algae, debris, and mosquito breeding.
The durable stainless steel motor is built to handle both fresh and salt water and runs maintenance-free. In colder climates, the unit can remain in the pond year-round—just disconnect the power during freezing conditions.
What’s Included
- 1/2 HP DA-20 Display Aerator
- Two solar panels with frame and mount
- Fhoton™ drive solar inverter
- Disconnect box and wiring components
- 70' power cord (longer lengths available)
Note: You’ll need to provide a vertical pole for mounting the panels, concrete footing, and anchoring ropes or weights for securing the fountain.
Specifications
| Horsepower | 1/2 HP |
| Spray Dimensions | 4 ft high × up to 15 ft wide |
| Flow Rate | 200 GPM |
| Voltage | 48V (Three-Phase) |
| Amp Draw | 10.3 Amps |
| Wattage | 370 Watts |
| Weight | 70 lbs |
Warranty Information
- Motor: 5 Years
- Non-Electric Components: 1 Year
- Power Cable: 1 Year
- Light Fixtures & Brackets: 2 Years
- Light Transformer: 1 Year
- Timers: 1 Year
All Scott Aerator products come with an industry-leading, no-questions-asked motor warranty. Warranty service requires shipping the unit to the factory for inspection. All replaced parts will be returned with prepaid shipping if requested.
Important: Disconnect power whenever swimmers are present.
Share